DIY-ATNTFIU: R32 Interior Removal Part 3 - Tragic Carpet Ride
Time to finish up and remove the final
bits of your R32 interior – the rear panels and the carpet. In
order to remove the lower rear panels you need to have removed the
rear seats first while the carpet will only come out if you've done
all the steps in the previous two parts and removed the seats, dash,
and center console. If you've made it this far the rest of this will
be as easy as baked pastries.
For this stage you'll need pretty much
the same stuff as before in terms of tools:
- Socket wrench set
- Phillips screwdriver
- Plastic panel poppers
- Another person would be nice when removing the carpet since it's quite unwieldy.
First we'll begin by removing the front
pair of seatbelts. Starting on either side, you'll want to undo the
rail at the bottom that holds the end of the belt. Just undo two 14mm
bolts and slide the rail off the seatbelt end:
 |
| Apologies for not having a better picture but this rail is held by just two bolts. Take them off to start removing the seatbelts. |
Once you get the rails out it's time to
undo the upper pivots. The bolt is covered by a plastic cover that
you can easily pop off with your hand by pulling on the top edge.
Once the cover is off it's another 14mm bolt to undo. Be careful not
to let the bolt fall down and having all the little spacers come
apart. They need to go back in a certain order so once the bolt is
off I recommend you tape up the bolt and spacers to keep them in
sequence when the time comes for you to reinstall.
 |
| Pop the cover off and the upper seatbelt bolt is revealed. |
After undoing the front seatbelts you
should unbolt the lower end of the rear seatbelt. This will allow you
to remove the trim panel around the rear quarter window. Another 14mm
bolt on the side of the floorpan where the rear seat goes and the
rear seatbelt comes free.
 |
| I showed you this picture in the seat removal DIY but this time I'm pointing out the seatbelt bolt on the left. |
Once the belts are free you can remove
the rear quarter window trim panel. First, carefully unclip the
curved trim piece around the rear seatbelt cutout. It pops off fairly
easily with gentle prying. Be careful not to break it because that
piece isn't available separately so if you damage it the only way to
get a replacement is buying the whole seatbelt assembly that it's
packaged with.
With the seatbelt trim piece out you
can then pry off the panel using your panel poppers and your hands.
The whole piece is held in just by a set of plastic retainers and
some metal clips. Be careful with your prying though since the panel
could be brittle and you can break the clips if you go crazy on them.
Once the panel is unclipped, slide the rear seatbelt through the
cutout and you're done with that part.
 |
| Here's the back of one of the rear quarter window trim panels so you can see the push fasteners that hold it in. |
To get the lower side panel out, the
process is similar. First, you have to undo the plastic piece around
the seatbelt cutout. This time it's held in by a screw that's hidden
behind the belt. Undo that and the trim piece pops out easily.
 |
| Move the belt aside, undo one screw, and this trim piece pops right out. |
After undoing the trim piece you pull
off the side panel in the same manner as with the window panel. Once
it's undone, slide the seatbelt through the hole and the side panel
is completely off.
 |
| Backside of the rear card. Just a bunch of push fasteners as well. |
To remove the rear parcel shelf, first
you'll need to examine how your speakers are mounted. My car had
aftermarket speakers fastened through the fiberboard shelf and into
the metal support by screws that I had to undo. Your car may have a
different setup, either OEM or aftermarket depending on what the
previous owner did.
After I undid the screws and removed
the speakers the parcel shelf was easy to remove by just pulling up
on the front edge until the five plastic retainers on the forward
half popped out. The rear edge is held by metal clips to the metal
shelf so once you have the front part undone you pull forward and the
parcel shelf will come out.
With all of those pieces removed the
only major piece of interior left aside from the door cards is the
carpet. This part is pretty fiddly but in my case the previous owner
had cut holes in it for a Do Luck brace so it had to be replaced.
Anyway, I wanted some lush modern carpet to replace the nasty old
stuff that had been ravaged by time, abuse, and random Japanese detritus.
First step is to remove all the things
holding the carpet to the floor pan. Starting from the driver's
footwell you'll want to remove the dead pedal and accelerator stop. The stop easily comes out with just one
Phillips screw to undo. The dead pedal has two obviously visible
screws but there's one more that's hidden. The footrest piece
actually pries off and underneath there's another screw to undo for
the dead pedal assembly to come off.
 |
| At first glance the dead pedal has only two screws but one more lurks underneath the footrest panel. |
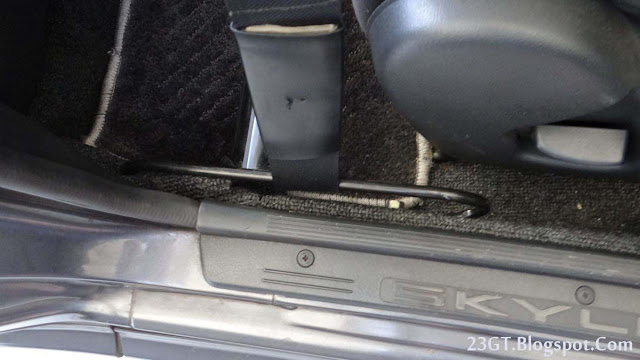
Proceeding to the metal beam that's in
the middle of the floor there are a couple of plastic push fasteners
you need to pry out with your panel popper and then the little metal
hooks for the floormats are removed by unscrewing the plastic
expansion retainers that hold them in.
 |
| They're hard to make out because it's all a sea of grey but you can see two push fasteners in each of the red circles and also the floormat hook in the bottom one. |
On the rearmost edge that sits
underneath the rear seat there are a couple more plastic push
fasteners to pry out.
 |
| The carpets already out in this shot but I've circled the three push fasteners for the rear edge of the carpet. |
Once you undo all of those the only
things left holding the carpet in are some velcro on the front, the
long plastic clips that attach it to the doorsills and the trunk
release lever. Pull off the plastic clips from the sills and then you
can start prying the carpet up beginning at the rear edge.
 |
| You can see here the white plastic clips for the carpet that are normally hidden by the plastic doorsill covers. |
Grab the front edge and pull it off the
velcro in the front footwells. Roll the carpet back to the center of
the cabin and once you have enough slack you can slide the trunk
lever out of the hole cut in the carpet for it. Most of the jute
padding underneath will be stuck to the carpet but some of it will
stick to the floorpan for you to scrape off later. After rolling the
carpet edges in you should be able to lift the whole thing out after
maneuvering it around the hand brake lever and gearshift.
 |
| Twenty-five year old carpet is nasty! But don't throw it away yet even if you're replacing it! You'll need it as a template. |
And there you go, one interior bereft
of all niceties. What's that? You say there's still some interior
left? Oh, the door cards. Why yes, I removed those too but I'll talk
about that another time after I've finished spiffying them up a
little bit. Look forward to that and other articles!
Important
disclaimer: Understand that working on your car can be inherently
dangerous. This is meant to be a guide only and does not take the
place of common sense and proper safety precautions. Only you can
ensure your own safety. Know your limits and ask for qualified help
if you're unsure of something. Every time you act stupid in the
garage...God kills a Miata.


Comments
Post a Comment