DIY-ATNTFIU: Floor Plans - Replacing Carpet and Installing Sound Deadening In Your R32 Part 2
In part 1 I talked about how to prep your R32's floor pan by cleaning
up, installing sound deadening, and adding a layer of cushy
closed-cell foam - now we'll talk about the ultimate step of
installing new carpet.
 |
If you've never done it before the idea of installing new carpet in a
car can seem like a pretty daunting task. This was my first time
working on carpet in a car and at first I thought I should call in an
expert to do it just because I'd hate to screw up the pricey new
material I got from Australia. After watching some online videos
though I decided it didn't look that difficult and so I mustered up
what little courage I have and made the attempt. As the British SAS
motto goes: “Who Dares, Wins Or Ends Up In An Embarrassing Youtube
Video”. I was never in the SAS so maybe I didn't quote that exactly
right but whatever.
Okay, so firstly, what do you need to do this job? Well, of course
the first thing you need is some new carpet and I covered where to
get that in part 1. However, ironically you also need your OLD carpet
too. Hopefully you didn't just throw it away after stripping down the
car or set it on fire during some crazy drunken Wiccan ritual or
something. The reason for needing the old carpet is simple – your
new carpet won't come pre-cut with holes for all the sticky-outy bits
on your floorpan (unless you managed to find an OEM replacement) so
the old stuff will serve as your template.
 |
| It may look like crap but my old carpet had a valuable role to play before I got rid of it. |
In addition to the materials you'll need some basic tools:
- a sharp cutter (note I said SHARP. Have plenty of replacement blades handy – it makes the job so much easier)
- some blackboard chalk (or some sidewalk chalk stolen from your little brother)
- maybe a good pair of scissors but a good cutter should be enough
- if you want to do this right an industrial-strength stapler will come in handy too. I'll explain why later.
- Optionally you'll want a sharp metal pokey stick. My friend Dan does restorations in his shop so he had a screwdriver that he'd ground down to a sharp point. This fancy-pants, NASA-worthy custom tool comes in very handy for making the small holes that can be a pain in the ass to try and make with a cutter.
Before you even begin to install the new carpet you should get it
ready ahead of time by laying it out inside the car. Since the carpet
comes rolled up you'll want to give it a chance to sit and stretch
out for a while so that it conforms better to the shape of the floor.
Leaving it at least overnight is usually recommended.
Once you've let your new carpet have it's last bit of rest before you
start cutting into it like some delicious prime rib at Cracker Barrel
it's time to grab your old carpet and the chalk and set about the
critical task of marking holes. A lot of aftermarket carpet like the
example I got comes in two pieces – front and rear. Start with the
rear piece and lay it out on the floor somewhere that you can move
around in. Then lay the old carpet on top and try to get the contours
to match as well as possible so that you can position the holes
correctly. Once you have the two carpets lined up, take the chalk and
mark out where all the holes in the old carpet were onto the new
material. Pay careful attention to making your marks because there
are a lot of holes you'll need to make – ones for the shifter and
handbrake, the hardware and brackets on the transmission tunnel, the
seat bolts (four to a side), the plastic floor ducting, the seat belt
receptacle wires, the lower seat belt bracket bolts (two to a side),
the dead pedal, the accelerator stop, the trunk release lever,
several plastic push fasteners, the two floormat pegs, and that
secret compartment you use to hide your doobie and a sentimental
photo of your girlfriend and/or dog.
 |
| This is the back half of the carpet after I'd made my chalk marks. |
 |
| This was the front. I'd already cut the middle holes at this point. |
After you've made your marks take off the old carpet and grab your
cutter. Don't try to cut all the holes just yet! Start by cutting the
middle holes only first. Once you've got those done take the carpet
and put it in the car. With the carpet in position you can start
cutting the other holes from the inner portion going outwards. This
helps to keep the carpet aligned properly and avoids you coming up
short on the edges.
For smaller round holes like the ones for the push fasteners use the
pokey stick if you have one. If you don't, or you need to make a
larger round hole like for the seat bolts, use the cutter but cut it
in an X-pattern starting from the center instead of trying to cut a
round hole. By cutting an X you can trim it to fit more easily and
avoid ending up mistakenly cutting too large a hole that you can't
cover up.
To help keep the carpet in the right position I fastened items as I
made the holes. For example, I unscrewed the two metal L-shaped
brackets for the center console bin to fit the carpet then screwed
them back in before proceeding on. As I cut each hole for the seat
bolts I also screwed in the bolts through the openings I made.
One hole to be wary of is the one for the trunk release lever. Since
you have to make the hole first and then slide the carpet into place
around the lever make sure you leave enough slack in the carpet to do
so by holding off on installing any bolts or plastic fasteners on the
driver side until after you've taken care of the trunk lever.
After getting the rear carpet piece in place you'll repeat the same
steps with the front carpet. Make sure you do the same process of
going from the middle outward to make sure the carpet aligns just
right.
 |
| Back carpet is in place and now I'm starting on the front. |
 |
| The dead pedal holes are a real pain in the ass to reach. |
 |
| After crawling around for a while on the floor the dead panel was finally back on. |
If you've got all the holes cut you'll then notice that there's
plenty of excess carpet on the sides that needs to be trimmed. Be
careful with this part. Make sure you have your inner trim panels
handy to judge how much carpet will be covered by the panels before
you cut. Remember the old saying: “Measure twice, cut once, or
forever hold your peace 'cause you just made a huge mess of things”.
The carpet should line up with the folded metal seam on the doorsills
if you cut them to the correct fit. If you're not in a rush it's best
if you let the carpet sit again for a while before you trim the edges
just so that it can conform as best as possible.
Now, once you've trimmed the carpet edges you may think that you can
just toss the trim panels back in and call it a day – and that you
can now burn the old carpet for that Wiccan ritual I mentioned. Hold
your horses friend, that old carpet has one last bit of usefulness to
squeeze out of it. When you removed it you probably noticed that it
had plastic clips on the sides that went over the seam on the
doorsills to keep the carpet in place. Well, you'll want to transfer
those over to the new carpet because the plastic doorsill plates
don't have enough tension in them to keep the carpet in place
properly.
 |
| See those white plastic clips on the bottom? Don't throw them out with the old carpet - try to reuse them. |
 |
| Here they are after I attached them to the new carpet with staples. |
To reuse the plastic clips, separate them from the old carpet by
cutting the carpet adjacent to the clips. Then once you have them
removed take a small screwdriver or a knife and carefully pull off
the old staples one by one. Attaching them to the new carpet is best
done with a heavy-duty staple gun. I used a Ryobi electric staple gun
I had around from a previous carpet project. By sandwiching the
plastic clip between a plate of scrap metal and the carpet I was able
to staple the clips to the edges of the new carpet. Once I did that I
slid the clips into place, reattached the door sills and presto, one
new set of carpet!
 |
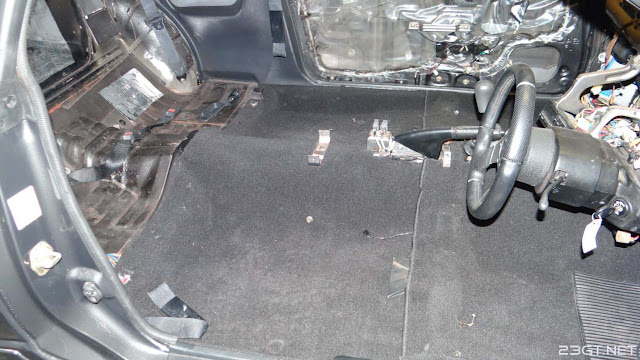
| Get it right and you end up with fresh new carpet and hopefully a major improvement to your R32's interior! |
 |
With your new carpet in place you can now start piecing your interior
back together and enjoy driving your R32 secure in the knowledge that
your carpet is fresh and free of encrusted tanuki turds, stale
Pocky, and 25-year old rice balls.
Important
disclaimer: Understand that working on your car can be inherently
dangerous. This is meant to be a guide only and does not take the
place of common sense and proper safety precautions. Only you can
ensure your own safety. Know your limits and ask for qualified help
if you're unsure of something. Every time you act stupid in the
garage...God kills a Miata.


Where did you get this carpet?
ReplyDeleteHi! The company I bought it from is called All Car Carpets. They used to list their stuff on eBay and that's where I bought my set from but it looks like they stopped selling that way. Here's their website though where you can probably order from them directly:
Deletehttp://www.all-car-carpets.com.au/