DIY-ATNTFIU: Changing Spark Plugs On An R32 GT-R
I did this job on my R32 ages ago and
have been meaning to get around to posting a DIY but other stuff kept
happening, one thing led to another, and next thing you know I'm
writing about changing spark plugs on my car after its motor has
already developed a case of leaky-cylinder-itis. Yes, this post is very
timely. Ah well, better late than never I guess.
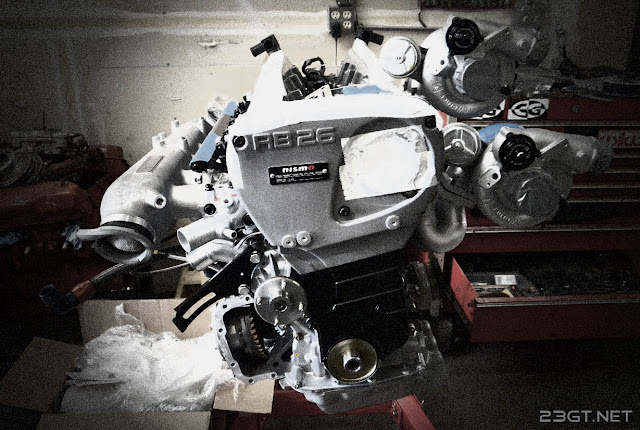
So, changing spark plugs on an RB26 is
a fairly simple process. It helps a lot that the RB is a straight six
so you have easy access to all the cylinders because they're all
pointed up and all in a nice row unlike other motors where getting to
the spark plus can only be described as a task suited for masochists
(cough, boxers, cough).
Before we start on the process you
might be wondering when you need to do this. The R32 service manual
recommends doing it every 100,000 kilometers. If you just got your
car it's a good idea to do it as a precaution even if the mileage
doesn't require it because looking at the plugs can tell you if there
may be any issues with how the car is running. Of course, some R32's
won't have accurate odometer readings or come with service records so
those are more good reasons to do it right away.
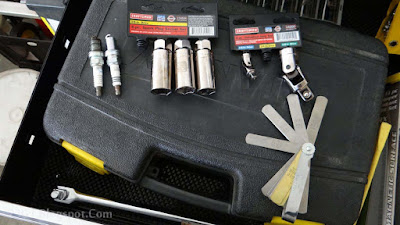
To do this you need just a few tools
and supples:
- Allen wrenches
- Phillips screwdriver
- Socket wrench
- Spark plug wrench or socket
- Spark plug gapping tool
- Vacuum cleaner with a crevice tool
- New spark plugs - as I've mentioned before in my post on basic preventive maintenance the OE plugs are NGK PFR6A-11 platinums. NGK Iridium BCPR7EIX plugs are a good replacement.
- A packet of anti-seize compound
So, begin by popping the hood on your
car. Yes, I know that sounds obvious but I wouldn't want you trying
to work out how to do this from underneath your car would I?
 |
| If you can see this then congratulations, you've successfully opened your hood! |
Whenever doing something related to the
electrical system on a car it's not a bad idea to disconnect the
battery but for something like changing plugs where the chances of
shorting something out or shocking yourself are very low most people
tend to omit this step. If you're new to working on cars and want to
take the extra precaution feel free to do so – it never hurts to
play it safe.
In order to gain access to the plugs
you need to undo the coil cover that's in the middle of your engine –
that's the plate in the middle that says “Nissan” on it. This
comes off easily just by undoing the eight allen bolts that hold it
down. On an RB26 you can get straight to undoing the coil cover but
on an RB20 or 25 there's a bit more faffing about needed because
there's a crossover pipe in the way that you have to remove first.
Ah, the perks of GT-R ownership.
 |
| Here you can see I've removed the coil cover already |
After undoing the bolts you can't
remove the cover entirely unless you disconnect the igniter module on
the back end of it. That's the square metal thing with two connectors
on it. You can undo the connectors and unbolt the igniter if you'd
like or if you're a lazy git like me you can just leave it be and
just lay the cover off to the side carefully. (On a side note R34 GT-R motors did away with the separate igniter module and switched to coil packs with integrated igniters. There's a chance your car won't have an igniter if the previous owner had it converted to the R34 setup).
 |
| Here's my igniter module. Yes, it's looking rusty and those oil catch can pipes look like crap. I feel so ashamed :( |
Once you can see under the cover you'll
find the coilpacks which are the wonderful gizmos that supply the
plugs with a nice jolt of juicy electrons to actually create the
spark that burns all that lovely dinosaur juice and create horsepower.
Each coilpack has a connector on top that connects it to the coil
harness. Take this chance to inspect the coil harness wires and see
if any have obvious cracking on the insulation. The RB26 is known to
develop ignition issues with time and an old frayed harness is a
common cause. If you have that problem buy a new one – preferably a
more durable one like a Do-Luck or a Wiring Specialties unit – and
replace it. Sealing a frayed wire with some electrical tape until you
can get a new harness is acceptable but replace it as soon as you
can.
If your harness is okay, undo the
connector for the first coilpack you want to work on – just push
down on the tab and pull it off. It doesn't matter which one you
start with but it's good to start from one end to the other in
sequence and do one plug at a time to avoid confusion. After you undo
the connector there are four philips screws holding down the coilpack
– undo those and then pull out the pack. Inspect it for any obvious
breaks in the rubber covering. Some people advocate wrapping
coilpacks in electrical tape but I'd be wary of doing that – the
valley where the packs reside gets really hot and you don't want a
gooey mess of tape as a result. Coil packs in good condition
shouldn't need taping up.
 |
| I've already undone the first two connectors here. You can also see how dusty the valley for the coils gets. Take a minute and wipe that dirt off with a rag before removing the coil packs. |
 |
| Here's one of my coil packs after removal. Don't worry if yours aren't red. The ones that came with my car were aftermarket ones. Stock ones are black. |
Now you can see the top of the actual
spark plug. Don't screw it out yet though! Once the plug is out the
dark hole that's left is a straight shot into one of your motor's
cylinders and you don't want crap like accumulated dust, dirt, and
the neighbor's annoying cat to fall in there. Here's where the vacuum
comes in handy. With the plug still there, stick your vacuum in and
suck up any flotsam that's made a home in that space. Once it seems
reasonably tidy now you can stick your spark plug wrench in and undo
the plug.
 |
| There's your spark plug. |
 |
| In this hole magic happens...so don't let any junk fall in there. |
Once the old plug is out, give it a
good look. The appearance can give you insight into your engine's
health and maybe even answer some of the most puzzling questions in
your life such as what you were destined to do or why Chinese food
always makes you run to the john after eating a bunch of it.
Nah, spark plugs aren't really like
crystal balls but how they look can tell you if your cars burning its
go juice okay. Normally the end of a used plug should look brown or
grayish-tan. Black soot can mean improper combustion. Oily black
deposits are bad news and indicate your cylinder is losing
compression and burning oil. If the electrode's worn then you should
be glad you got around to doing this because that plug's ready for
spark plug heaven.
 |
| Compare the brown tip of my old plug to the nice shiny replacement |
Once you're done divining life's
mysteries with the old plug you can get around to putting in the new
one. First, double check the gap. Most plugs are pre-gapped now but
it never hurts to be sure that you didn't get a clunker. NGK says the
BCPR7EIX should have a .032 inch gap so stick your feeler gauge in
there and see if that's what it has if you're using that type of
plug.
After doing that, put some anti-seize
compound on the threads to make your life easier the next time you do
this and start threading the new plug into the hole. Be careful not
to cross thread the suckers! If it doesn't feel like it's going in
right it probably isn't so undo and try again. And don't overtighten
either. Get the plug snug but don't wail on it with the wrench like
an orangutan having an epileptic fit. To get the plug in place don't just drop it in there and hope for the best because you may screw up the electrode. A plug socket or wrench that has a rubber lining to grip the plug is helpful here but if yours doesn't do that you can use a long-nose plier or insert the plug in a piece of rubber tubing to act as a handle.
Once the plug's in place you can put
the coil pack back on and screw it down. Attach the harness connector
and then rinse and repeat this process five more times for the rest
of the plugs.
 |
| You may have to undo the hoses to your cam cover breathers to get access to the sixth plug. You'll also probably need a nice long extension for your socket wrench. |
After you get all six plugs just pop
the coil cover back on and then go back in the house and have a nice
vodka martini. Or you could skip that and drive your car. Whatever
floats your boat.
Important
disclaimer: Understand that working on your car can be inherently
dangerous. This is meant to be a guide only and does not take the
place of common sense and proper safety precautions. Only you can
ensure your own safety and that of your vehicle. Know your limits and
ask for qualified help if you're unsure of something. Every time you
act stupid in the garage...God kills a Miata.


Nice write up. I would like to emphasize the use of the rubber hose to hold the plug when trying to insert it. I would choose this over the spark plug socket even. The rubber hose has enough tension on the plug to get it threaded properly, but will slip if you start to cross thread. Virtually eliminates the possibility of cross threading. Also, love the use of the word flotsam.
ReplyDeleteGood point about the rubber hose. I just use my socket and socket extension and turn it manually to start instead of using the wrench but using a hose is better if someone doesn't have a feel for it yet. And yes, flotsam is an underused word lol.
DeleteNice diy pre. :) By the way I'll also add that maybe instead of removing those many small bolts per coil pack, we can remove the size 12 bolts instead. It's the one that holds the coil pack bracket. It will be 3 coil packs per one bracket. It's easier to undo compared to the 24 small bolts (4 per coil pack) that we removed here. ;)
ReplyDeleteGood point about removing the brackets. It's definitely easier if you're just working on the plugs and aren't too interested in the coils. For the purposes of this DIY though I thought most people would want to remove the coil packs to inspect or replace them.
Delete